Duration 25:6
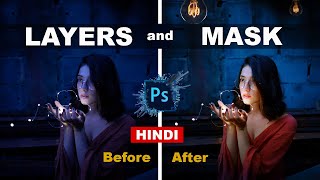
Photoshop Edit Menu with Examples in Hindi - फोटोशॉप एडिट मेन्यू | Photoshop Tutorial Part-4
Published 10 Apr 2020
Photoshop Edit Menu with Examples in Hindi - फोटोशॉप एडिट मेन्यू | Photoshop Tutorial Part-4 Follow @Twitter: https://twitter.com/ishanllb Follow @Instagram: https://www.instagram.com/ishanllb Join Our Telegram Channel : https://t.me/ishanmonitor My Mic : https://amzn.to/2CYC2k2 My Camera : https://amzn.to/394SD1Y My CPU : https://amzn.to/2U58Boj My Monitor : https://amzn.to/2wnX4rf UNDO (CTRL + Z) This command is used to delete the impact of the most recently applied command on the Photoshop document. STEP BACKWARD ( ALT + CTRL + Z) This Command is used to undo or remove the impacts of the two or more than two recently applied commands from the Photoshop document one by one. STEP FORWARD (SHIFT + CTRL + Z) This command is used to apply back the removed impacts of the two or more than two commands on Photoshop document. FADE This command can only be applied right after the use of any Tool, Adjustment or Filter. The main purpose of this command is to reduce the opacity of the most recently applied tool (e.g. Brush Tool, Eraser Tool, Pencil Tool, Blur Tool, Shape Tool ,Sponge Tool etc.), filter (e.g. Liquefy, Render, Distort etc) or Adjustment (e.g. Level, Hue and Saturation, Invert, Desaturate etc). CUT (CTRL + X) Through this command we can transfer any selected image or a selected part of an image temporarily from the canvas to computer’s memory (Clip Board). Whenever we use this command, selected image or the selected part of an image vanishes from its place and appears only when we use another command named Paste given in the same menu. COPY (CTRL + C) Through this command we can create a copy of a selected image or the selected part of an image temporarily into computer’s memory in an area that is called Clip Board. By using Paste command we can have that copy on some other document or on any other layer of the same document. In this case the original image remains intact on its first place. COPY MERGED (SHIFT + CTRL+ C) This command is used to copy the visible parts of all the layers inside the selected area in the form of a single layer. PASTE (CTRL + V) This command is used to drop and display images that we have saved in the Clipboard by applying Cut , Copy or Copy Merged commands. PASTE INTO This command is used to drop and display images that we have saved in the Clipboard by applying the command named Copy on the separate layer of the same document with layer mask beside. By filling whit, black and grey colors inside the layer mask you can manipulate the transparency of layer beside the mask. CLEAR In Adobe Photoshop 7.0 the command named Clear is used to delete the selected part of the layer that is currently selected in the layer palette. CHECK SPELLING Through this command you can correct the spelling mistakes made accidentally in the text, typed on the Photoshop document. FIND AND REPLACE TEXT If you have used any specific word many times in the text typed on Photoshop document and you want to replace that word with some other word in an instant, you can use the option named Find and Replace Text given in the Edit Menu. FILL This command is used to fill any desired solid color or predefined pattern inside the selected layer with desired level of Opacity. Further through this command you can apply different Blending Modes on the selected solid color or pattern, filled inside the selected layer. STROKE This option is used to create outline around the selected area. Through this option you can not only create outline around the selected area, but you can set the Width, Color, Location, Blending Mode and Opacity for that outline. Further through this option you can decide whether the transparency of the selected layer should be preserved or not. FREE TRANSFORM (CTRL +T) Through this command you can easily re-size any selected layer and rotate it in any direction. Further, while composing with Photoshop, you can skew a completely straight sided object or you can make a completely different object out of it by distorting its initial features. Moreover, after putting any layer in the state of free transformation, you can widen or shorten its upper, lower,right and left sides to give more natural look to an object drawn on the same layer. tags: photoshop tutorial in hindi,photoshop tutorial,edit menu in photoshop in hindi,edit menu in photoshop 7.0,फोटोशॉप एडिट मेन्यू,photoshop file menu with examples in hindi,photoshop kaise use kare,photoshop tutorials for beginners,ishan computer academy,ica photoshop tutorial,ica photoshop part 4,photoshop by ishan,ishan academy,how to use photoshop,stroke in photoshop,stroke in photoshop hindi,free transform photoshop in hindi,purge in photoshop,ishan computer
Category
Show more


Comments - 179
Related videos for Photoshop Edit Menu with Examples in Hindi - फोटोशॉप एडिट मेन्यू | Photoshop Tutorial Part-4: